
When you want to run many computers on top of your Intel NUC you what the footprint of your host to be as minimal as possible. Today you can chose from a number of virtualisation systems and they have all pro and cons which leaves the choice up to you. I choose Windows Hyper-V Server 2019 mainly because I easily want to be able to copy machines to other Windows computers, like my laptop running Windows and to Microsoft Azure as well.
To be able to run Windows Hyper-V Server 2019 on Intel NUC you need the following (see list below) and read my article Lab environment in a small package.
- Intel NUC (recommend version 10 or later with Intel i7 CPU)
- Intel NUC network driver - can be downloaded from Intel NUC homepage.
- Windows Hyper-V Server 2019 - can be downloaded from Microsoft and is free.
- USB stick (recommend 16GB USB3)
- ISO to USB software - write Windows Hyper-V Server ISO to USB stick.
- DevManView - software used to identify network device id.
After you got all the hardware and software above it is time to begin and prepare for the installation. Start of using the ISO to USB software and create an USB bootable version of Windows Hyper-V server. When finished add DevManView executables and Intel NUC network drivers for your Intel NUC to the USB drive.
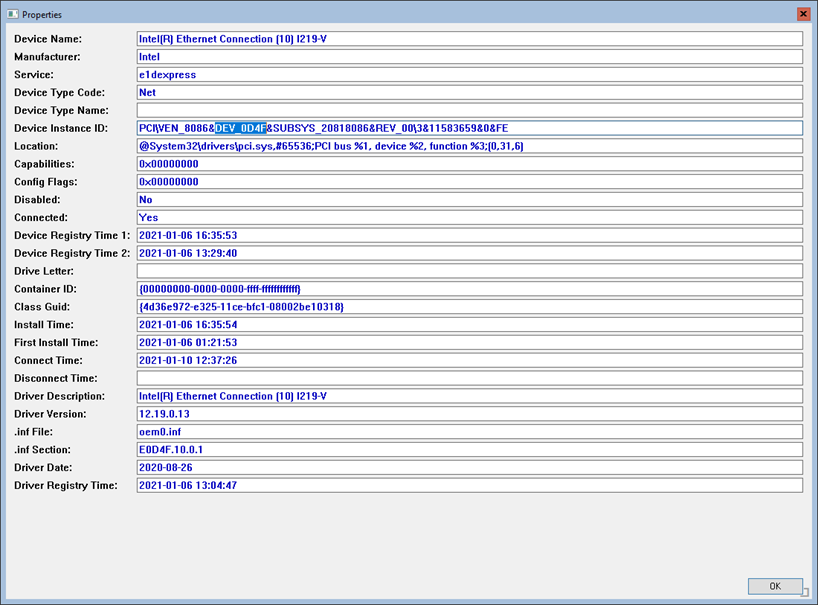
Boot your Intel NUC on the USB stick and follow the instructions to install Windows Hyper-V Server 2019. After the server is installed and it starts the configuration you will get a error message that the system cant find any network adapter. But no worries we will solve this next. Exit configuration to a command prompt. Run DevManView from your USB stick and find your network card and according device id. Note that it is the network card we are after not the wireless network card. Make a note of the device id (should be DEV_0D4F).
Run the setup for your network card driver and wait until it has unpacked all files. If you are using an Intel NUC generation 10 you are interested in the NDIS68 files which can be found in the following path: %USER%\AppData\Local\Intel\WZSE0.TMP\PRO1000\Winx64\NDIS68. Copy NDIS68 folder with containing files to your USB stick. Cancel the network card driver setup.
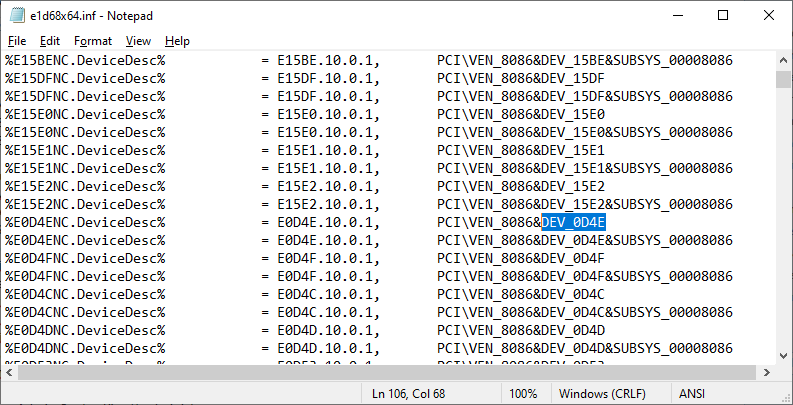
On your NUC or on another computer with your USB stick added. Browser the NDIS68 folder and open e1d68x64.inf file in a text editor, like Notepad or something more modern. Search from the top for the device id (DEV_0D4F in my case) in the file. Search result in my case looked like this (see picture below). Copy the entire row and the row below.
 This device id is found under the Windows 10 section (see picture below) and Windows Server 2019 cant find this driver specification.
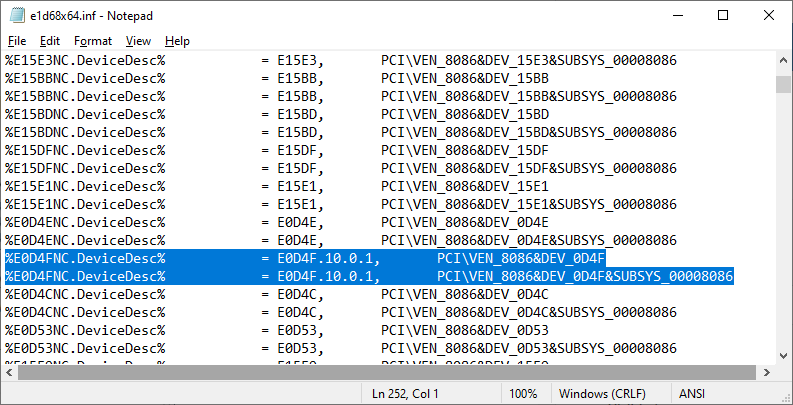
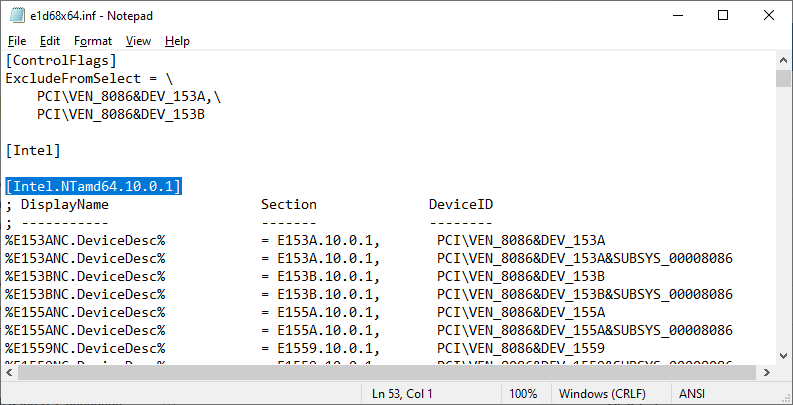 Now scroll down and look for the Windows 2019 server sections [Intel.NTamd64.10.0] and [Intel.NTamd64.10.0...18362]. Paste the copy rows into both sections like this (see picture below).
Save the file and get ready to install your re-written file. Because we changed the file the certificate will not be valid so we have make some changes to be able to use it. First of we change the boot information and then we change the bios settings.
In a command prompt on the Intel NUC we write following command.
BCDEDIT.EXE /SET TESTSIGNING ON
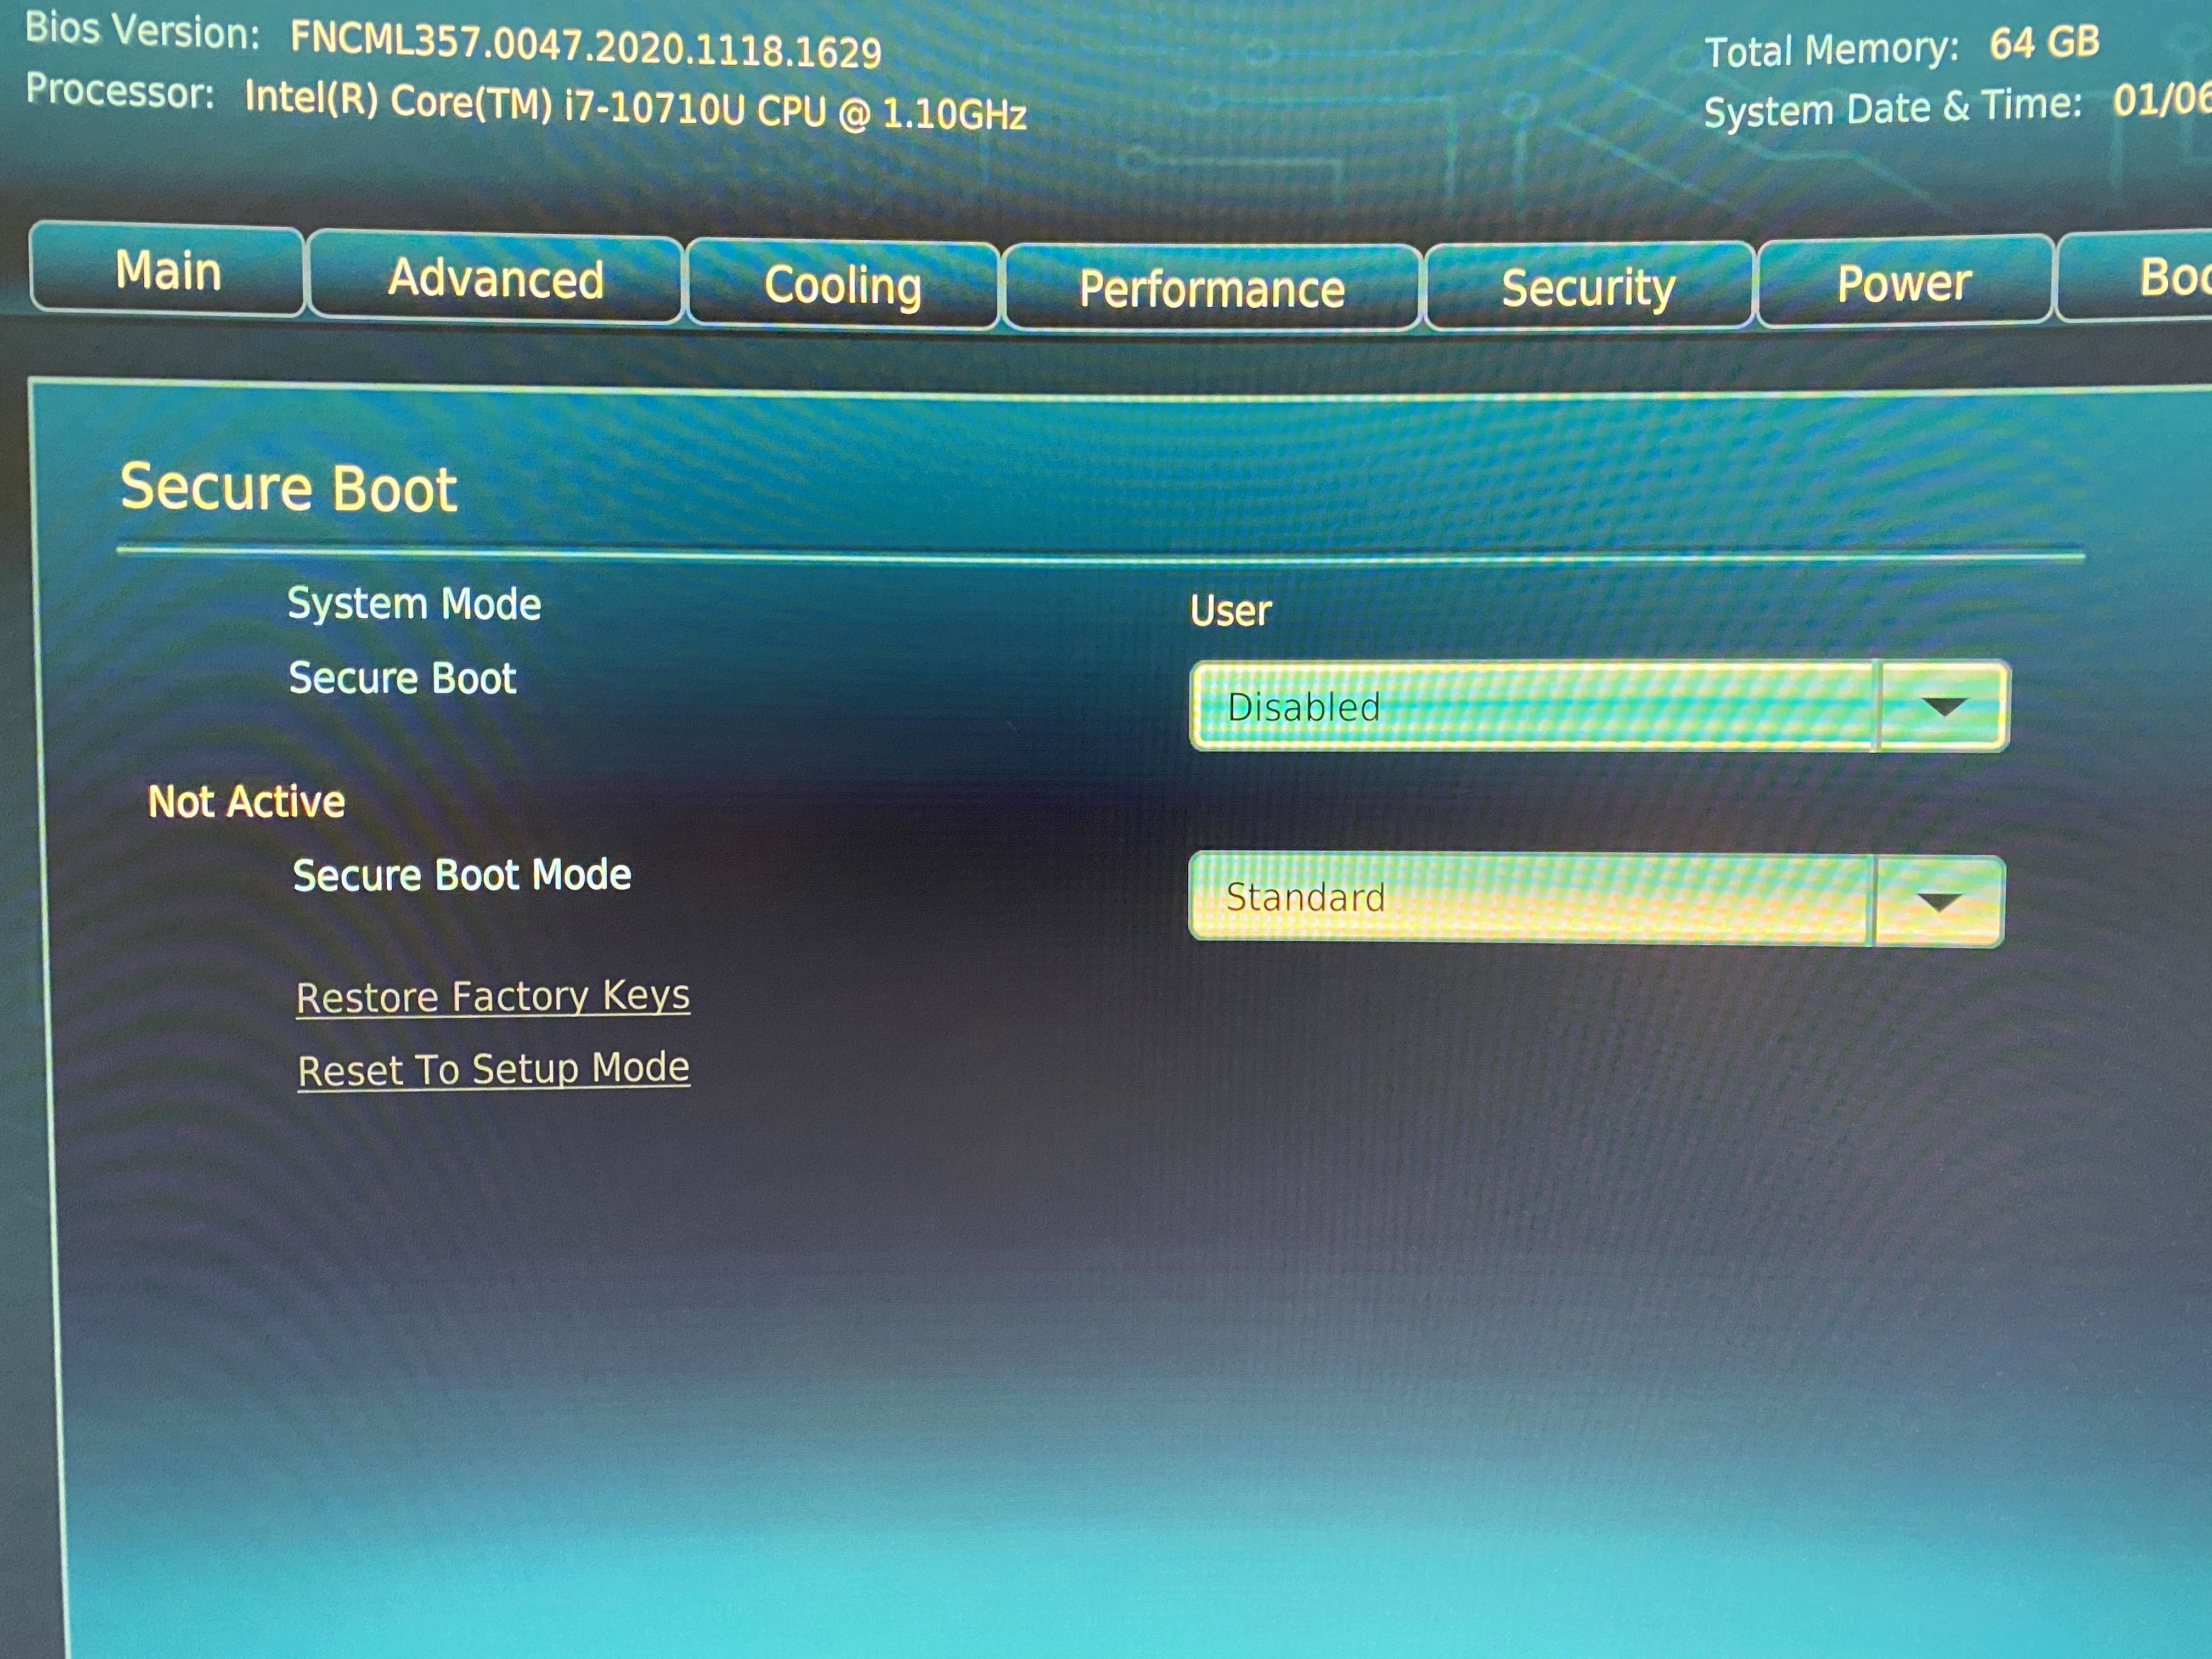
Boot the Intel NUC and enter BIOS using F2. In the Boot section change "Secure boot" to Disabled and save changes.
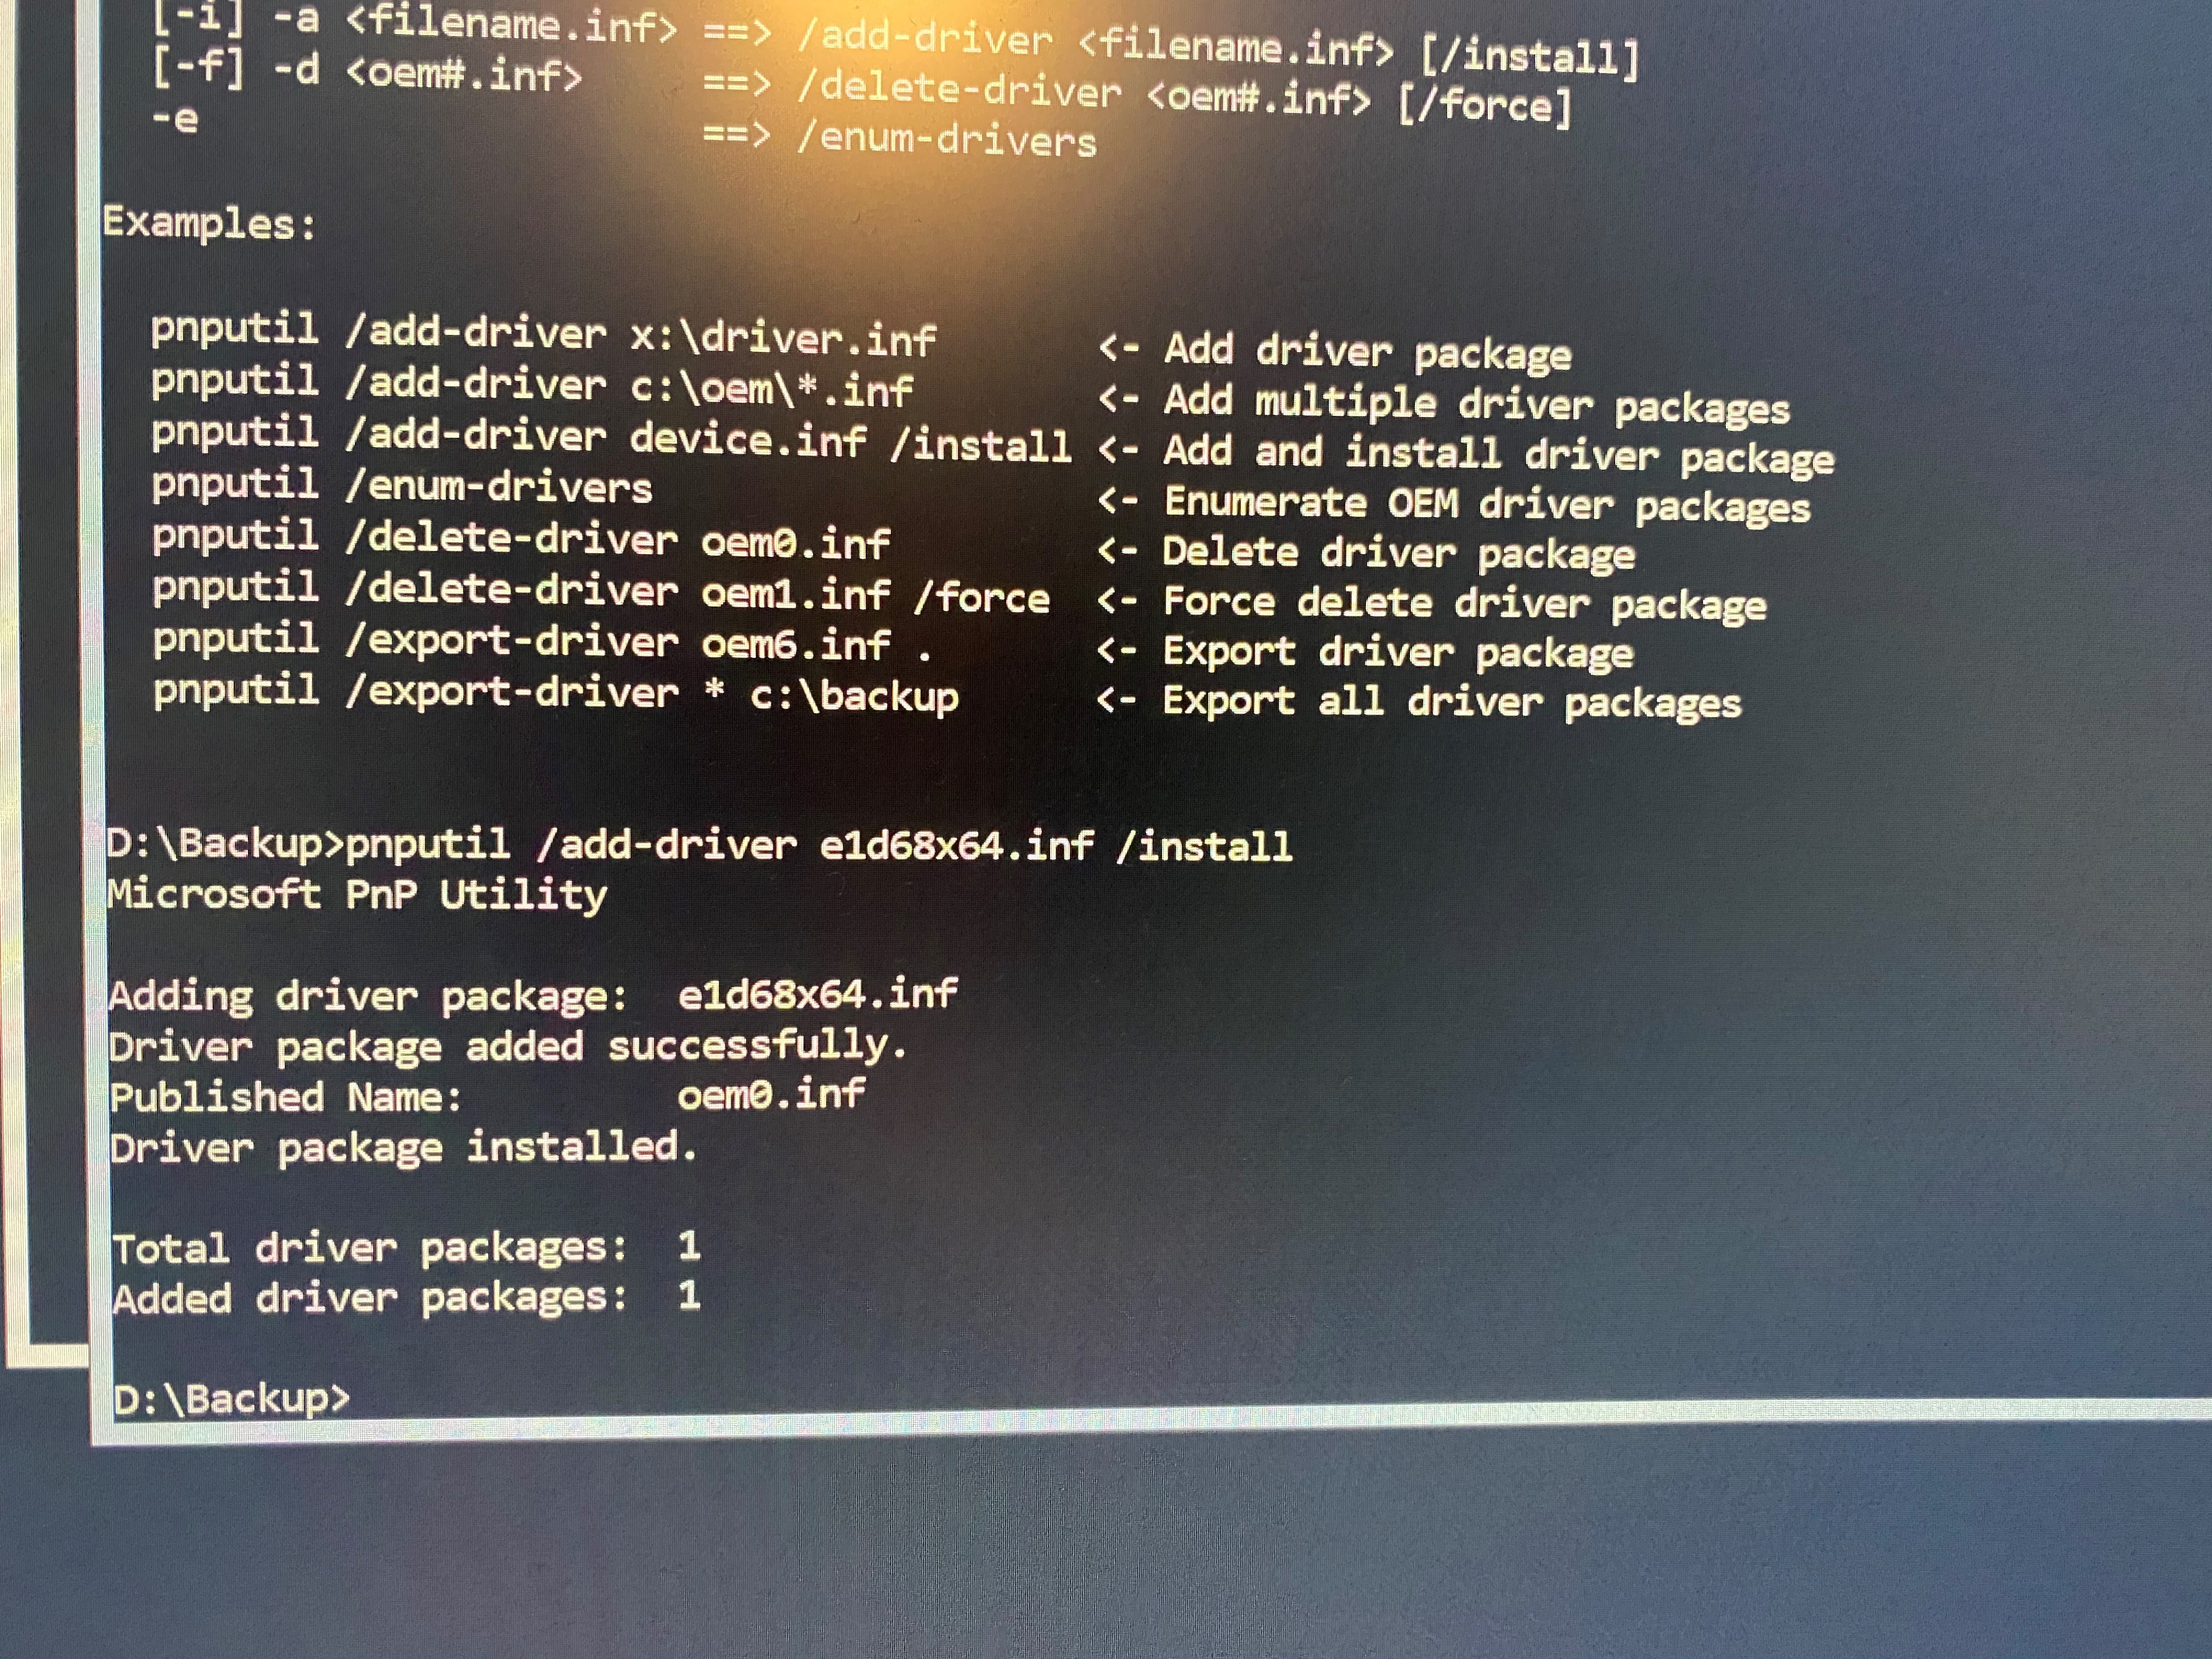
Boot your Intel NUC into Windows Hyper-V Server and open a command prompt. Go to your driver folder and enter the following command.
Pnputil /add-driver e1d68x64.inf /install (You will get a warning but that is okay in this situation.)
After the installation have finished you can enter ipconfig command and verify that you have got an ip address.
Next step is to secure your machine again and reverse so that only signed drivers are allowed. Enter the following command.
BCDEDIT.EXE /SET TESTSIGNING OFF
Restart you computer and enter BIOS using F2. In the Boot section change "Secure boot" to Enabled and save changes.
Now you are done and can start configure your Hyper-V machine and add computers. Read my article Manage Windows Hyper-V Server 2019.
Comments
4 comments
Great tutorial. I just want to add that you can edit the .inf file on the Hyper-V itself using notepad.exe that's one less step.
Hello,
Thank you for your Tutorial.
Unfortunately that doesn't work for me. I can get to this message but after that I still have no network. Where can I start troubleshooting?
Peter, do you know if NUC 12 and 13 work with Hyper-V Server 2019? There are some reports that the performance/efficiency core mix in (some) latest Intel CPUs does not work with Server 2019/2022 Hyper-V role. I have not read any such reports on Hyper-V Server 2019.
I haven't had the opportunity to run Hyper-V Server on Intel NUC 12 or 13 so I don´t know. Hopefully some one else reading this have the proper information.
Please sign in to leave a comment.